If you want your logo to look crisp, professional, and perfectly stitched on apparel, hats, or merchandise, Logo Digitizing Services are a must. This process takes your digital logo and converts it into a machine-readable format, allowing embroidery machines to produce flawless results. Whether you’re a business owner, a designer, or a hobbyist, understanding logo digitizing is key to getting high-quality embroidery every time. In this guide, we’ll cover everything from what logo digitizing is, the process involved, tips for best results, and why professional services make all the difference.
What Are Logo Digitizing Services?
Logo digitizing services transform your artwork, usually in vector or raster format, into a file that embroidery machines can read. This isn’t just a simple conversion—digitizing involves determining the right stitches, density, underlay, and sequence to make your logo look perfect when stitched on fabric.
Why You Need Professional Logo Digitizing Services
- Accuracy: Machines need precise stitch paths to avoid gaps or overlaps.
- Efficiency: Properly digitized logos save time and reduce production errors.
- Scalability: Digitized logos maintain quality whether stitched on a small cap or a large jacket.
- Consistency: Every embroidered logo looks the same, maintaining your brand image.
Without professional digitizing, your logo could appear distorted, uneven, or messy when embroidered.
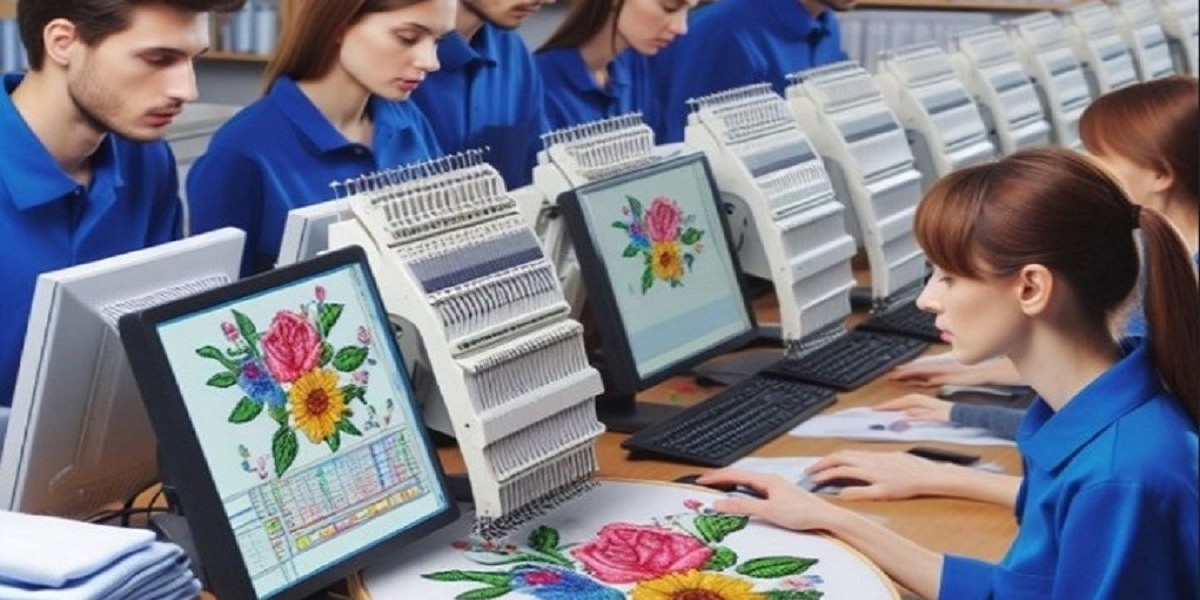
The Logo Digitizing Process Explained
Professional logo digitizing is more than converting a file it’s a step-by-step process to ensure quality stitching.
Step 1: Artwork Analysis
Before digitizing begins, experts analyze your logo. They consider:
- Line thickness
- Color palette
- Text readability
- Complexity of shapes
This helps decide whether adjustments are needed to make the logo embroidery-friendly.
Step 2: Choosing the Right Stitch Types
Different parts of a logo require different stitches:
- Satin Stitch: Perfect for borders, lettering, and small details.
- Fill (Tatami) Stitch: Ideal for larger areas or shapes.
- Running Stitch: Used for outlines or very fine details.
Choosing the right stitch ensures smooth curves, even fills, and long-lasting embroidery.
Step 3: Applying Underlay
Underlay stitches act as a base for your logo’s top stitches. They prevent fabric from puckering, stabilize the design, and help maintain color alignment. Common types include:
- Edge run
- Zigzag
- Center walk
A good underlay is crucial for professional-looking embroidery.
Step 4: Setting Density and Pull Compensation
- Density: Determines how tightly stitches are placed. Too dense can break threads; too sparse leaves gaps.
- Pull Compensation: Adjusts for fabric stretch during stitching, preventing distortion of curves and lines.
Proper settings ensure your logo looks exactly as intended.
Step 5: Sequencing and Pathing
Pathing is the order in which the machine stitches your design. Smart pathing:
- Reduces trims and jumps
- Saves production time
- Prevents thread tangles and machine errors
Every professional logo digitizer prioritizes efficient pathing.
Step 6: Exporting in Machine-Ready Formats
Depending on your embroidery machine, digitized logos are exported in formats like:
- PES (Brother, Babylock, Bernina)
- DST (Tajima)
- EXP (Melco)
- JEF (Janome)
- PXF (Pfaff)
Having the correct format ensures your logo stitches accurately the first time.
Step 7: Test Stitch-Out
Before production, a test stitch-out is performed. This reveals:
- Density issues
- Misaligned threads
- Unstable fills
- Overall logo appearance
Testing allows adjustments before full-scale embroidery.
Tips for a Perfect Digitized Logo
Here are some practical tips to ensure the best results when digitizing your logo:
1. Start With High-Resolution Artwork
Vector files (AI, EPS, SVG) are ideal. If using raster files (PNG, JPG), make sure they are high resolution to maintain clarity.
2. Simplify Your Logo
Complex logos with too many details may not stitch well. Remove small gradients, unnecessary shapes, and fine lines for better embroidery results.
3. Choose Readable Fonts
Text smaller than 4-5mm may not be legible in embroidery. Use bold or block fonts for clarity.
4. Keep Shapes Closed
Open paths in logos can lead to gaps during stitching. Always ensure shapes are closed.
5. Test Before Production
Always do a small sample stitch to ensure density, thread tension, and alignment are correct.
Common Mistakes to Avoid
Even small errors in digitizing can ruin your embroidered logo:
- Relying solely on auto-digitizing tools
- Using extremely thin lines or tiny text
- Ignoring fabric type or stretch
- Skipping underlay or pathing adjustments
- Not performing a test stitch
Avoiding these mistakes ensures consistent, professional results.
Benefits of Professional Logo Digitizing Services
Outsourcing your logo digitizing comes with multiple advantages:
- High-Quality Stitching: Professionals know how to optimize stitch paths and density.
- Time-Saving: Skip trial-and-error and get machine-ready files quickly.
- File Versatility: Get multiple formats for different machines.
- Error-Free Production: Reduce wasted threads, fabric, and time.
- Consistent Branding: Every logo looks perfect, maintaining your brand image.
Professional digitizers combine technical skill with industry knowledge to deliver polished results every time.
Who Should Use Logo Digitizing Services?
- Businesses: Get logos embroidered on uniforms, hats, jackets, and merchandise.
- Designers & Creatives: Transform digital artwork into stitch-ready embroidery files.
- Embroidery Shops: Streamline workflow and produce professional-quality logos for clients.
- Hobbyists: Ensure personal projects, gifts, or custom designs come out perfectly.
No matter the scale, professional logo digitizing guarantees your design looks its best.
Conclusion
Logo Digitizing Services are essential for turning your digital artwork into precise, professional embroidery designs. From selecting stitch types and adjusting density to applying underlay and testing sew-outs, every step is crucial for clean, durable results. Investing in professional digitizing not only saves time but also ensures your logos appear consistently across all projects.
For businesses, designers, and hobbyists looking for high-quality, accurate, and efficient logo digitizing, Digitizing Buddy provides expert services that make your logos ready for embroidery with precision and care.