How to connect HP printer to wifi is a question many users ask when they want to set up wireless printing without hassle. With the convenience of wireless networks, connecting your HP printer to WiFi allows you to print from multiple devices like laptops, smartphones, and tablets without physically plugging in cables. This step-by-step guide will walk you through the process in detail, including troubleshooting tips to ensure your printer connects smoothly to your WiFi network.
Why Connect Your HP Printer to Wifi?
Connecting your HP printer to WiFi offers several advantages:
Wireless Convenience: No need for cables; print from anywhere within your network range.
Multiple Device Access: Multiple users can print without moving the printer.
Improved Productivity: Quick setup for home offices and workplaces saves time.
Mobile Printing: Print documents directly from smartphones and tablets using HP Smart App or other compatible apps.
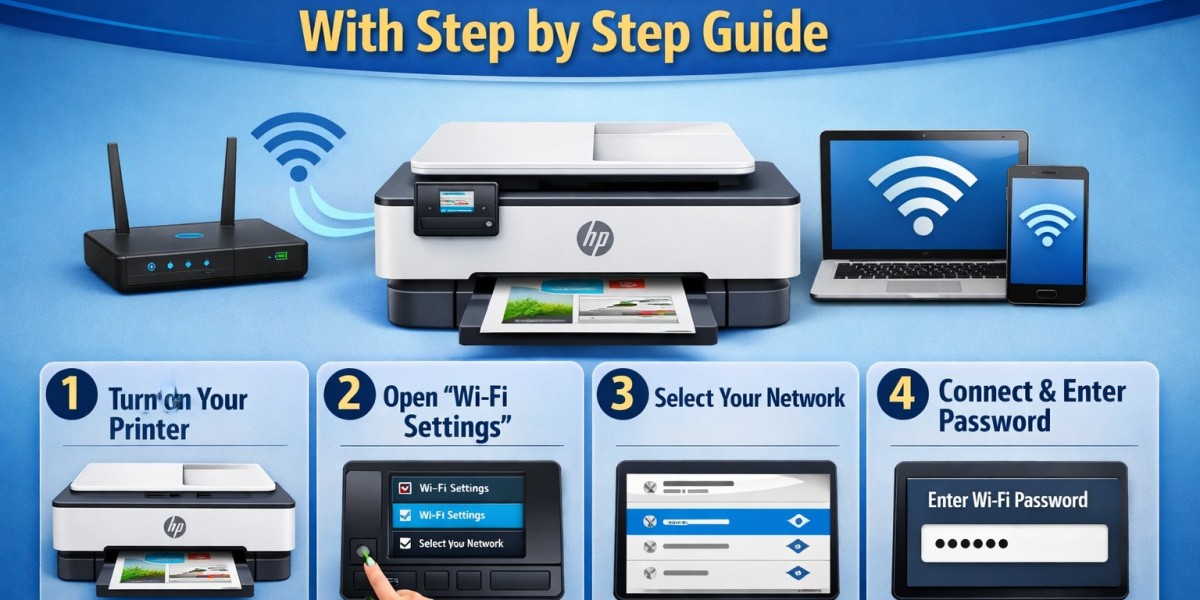
Now, let's dive into the step-by-step process to connect your HP printer to WiFi.
Step 1: Prepare Your Printer and Network
Before beginning the setup, make sure:
Your printer is powered on.
Your WiFi router is functioning properly.
You know your WiFi network name (SSID) and password.
If applicable, ensure your HP printer software is installed on your computer or mobile device.
Having these essentials ready will make the setup process smooth and avoid common connectivity issues.
Step 2: Use the Wireless Setup Wizard (For Printers With Touchscreen)
Most modern HP printers with touchscreens have a built-in Wireless Setup Wizard:
On your printer's control panel, touch the Wireless icon or navigate to Settings > Network Setup > Wireless Setup Wizard.
The printer will search for available WiFi networks.
Select your WiFi network from the list.
Enter your network password using the touchscreen.
Confirm the settings and wait for the printer to connect.
Once connected, the wireless icon on your printer will appear solid, indicating a successful connection.
Step 3: Use WPS Push Button (Alternative Method)
If your router supports WPS (WiFi Protected Setup), you can connect your HP printer without manually entering a password:
On your printer, press the Wireless button or access Settings > Network > WPS.
Press the WPS button on your WiFi router within two minutes.
The printer will automatically detect the network and connect.
This method is quick and ideal for users who prefer not to type passwords.
Step 4: Install HP Smart App
The HP Smart App is available for Windows, macOS, Android, and iOS. It simplifies wireless printer setup and management:
Download and install HP Smart from the HP website or app store.
Open the app and click Add Printer.
Select your HP printer from the available devices list.
Follow the on-screen instructions to connect the printer to your WiFi network.
The app also allows you to monitor ink levels, print, scan, and troubleshoot issues from your device.
Step 5: Connect HP Printer Without Touchscreen
Some HP printers don’t have a touchscreen. In that case, you can connect via HP Smart App or WPS:
Using HP Smart App:
Launch HP Smart and select Set Up a New Printer.
Connect your printer to your device via USB temporarily.
Follow the app instructions to connect to WiFi.
Using WPS:
Follow the same WPS steps mentioned above for wireless connection.
Step 6: Verify Connection
After completing the setup, it’s crucial to verify the connection:
Print a Wireless Network Test Report from your printer (usually under Settings > Network > Reports).
Ensure the printer shows a valid IP address and connected status.
On your computer, go to Devices and Printers, select your HP printer, and print a test page.
If the test page prints successfully, your printer is properly connected to WiFi.
Step 7: Troubleshooting Common Issues
Sometimes, connectivity issues can occur. Here are common problems and solutions:
Printer Not Found on Network:
Restart your printer and router.
Ensure both devices are on the same WiFi network.
Incorrect Password Error:
Double-check the WiFi password.
Re-enter it carefully, considering capitalization and special characters.
Printer Keeps Disconnecting:
Place the printer closer to the router.
Avoid interference from walls or other electronics.
Firewall Blocking Printer:
Temporarily disable firewall or antivirus software during setup.
Ensure the printer is allowed through your network.
Step 8: Connect Multiple Devices
Once your HP printer is connected to WiFi, multiple devices can be set up to print wirelessly:
On Windows: Go to Settings > Devices > Printers & Scanners > Add a Printer.
On Mac: Go to System Preferences > Printers & Scanners > + to add your printer.
On Mobile Devices: Use HP Smart App or AirPrint for iOS devices.
This makes printing from different devices seamless and convenient.
Step 9: Maintain Wireless Printing
To ensure reliable wireless printing, follow these maintenance tips:
Keep your printer firmware updated using the HP Smart App.
Regularly restart your router to maintain network stability.
Avoid moving the printer frequently to prevent disconnections.
Keep the printer software updated on all connected devices.
Conclusion
Setting up a wireless HP printer might seem tricky initially, but with this step-by-step guide, the process becomes straightforward. Whether your printer has a touchscreen, you use the HP Smart App, or employ the WPS method, these steps cover all scenarios to ensure a seamless WiFi connection.
Connect HP printer to wifi today and enjoy hassle-free wireless printing from all your devices at home or in the office. With proper setup and occasional maintenance, your HP printer will deliver consistent performance and convenience.